Adding breaks for teachers
Print
Modified on: Tue, 19 Sep, 2023 at 10:54 AM
How to add breaks in PTC Wizard:
1. Access the PTC Wizard platform using your administrator login credentials.
2. Navigate to the scheduling section by clicking on "All events". (If you don’t have any events created, look for an article about how to create a conference).
3. Choose your event and click on the section with the “Schedules” label.

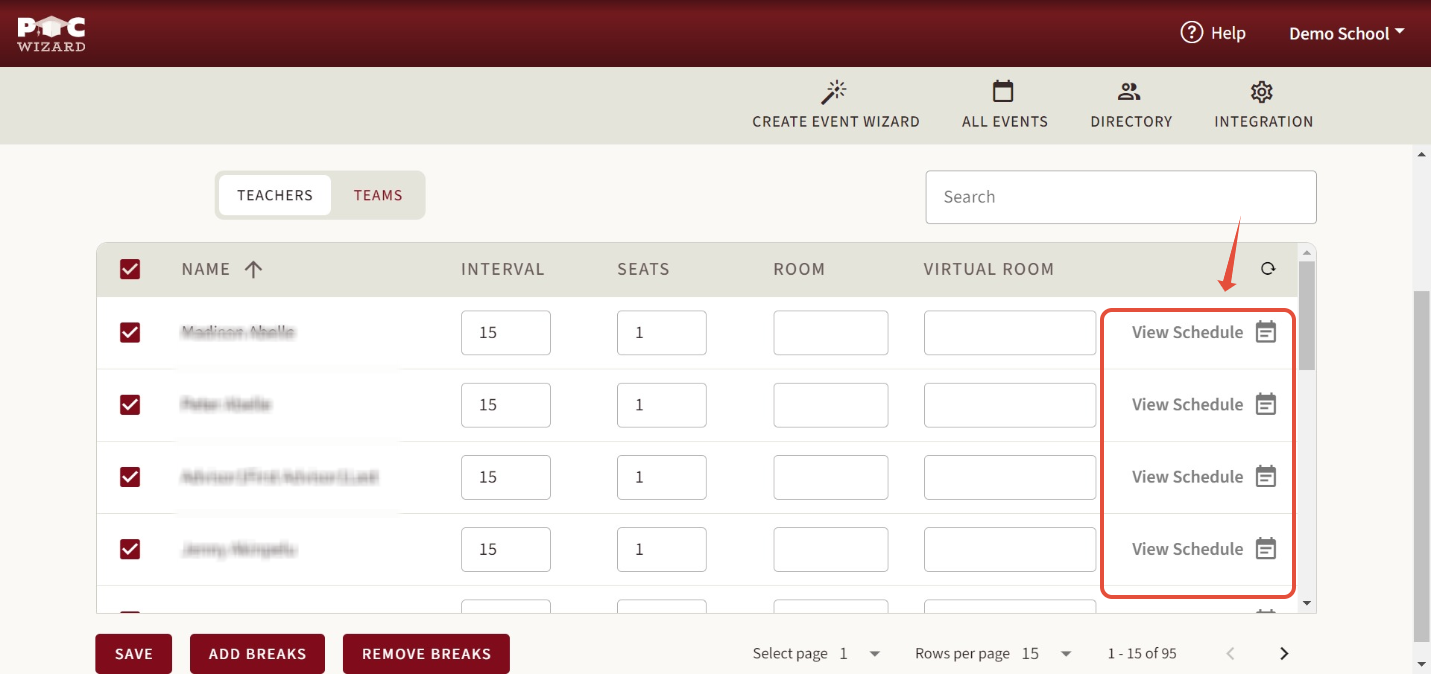
4. Access the list of teachers and teams, where you can view and manage appointment slots and availability by clicking on the “View schedule” button.

5. Identify the specific date and time slots where you want to add breaks. Breaks are usually added during non-conference hours or when you want to restrict scheduling.
6. The option to create breaks/meetings is represented by icons "Add Break," “Add meeting “. You always have a chance to delete the meeting\break by clicking on the trash icon on the right.

7. PTC Wizard offers another feature, that admins might find useful. You should also see the option “Add breaks” at the bottom of the page, where you can add breaks for everyone at the same time. For more information, please click here.

8. Please don’t forget to save the changes you made to continue your scheduling process

Did you find it helpful?
Yes
No
Send feedback Sorry we couldn't be helpful. Help us improve this article with your feedback.


